Table of Contents
Julia 的标准库 Markdown.jl 可灵活高效地解析 markdown, 从 Julia 0.4 版本开始, Markdown.jl 便成为 Julia 的基础库.
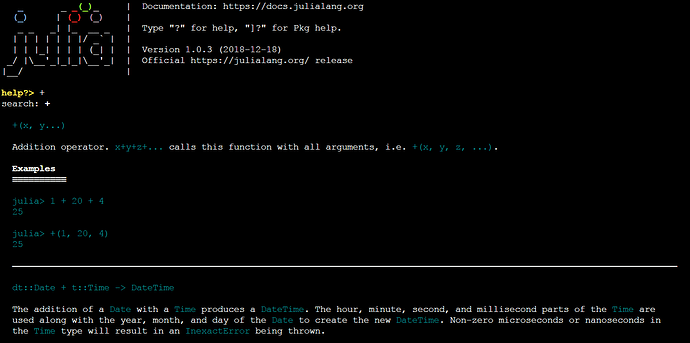
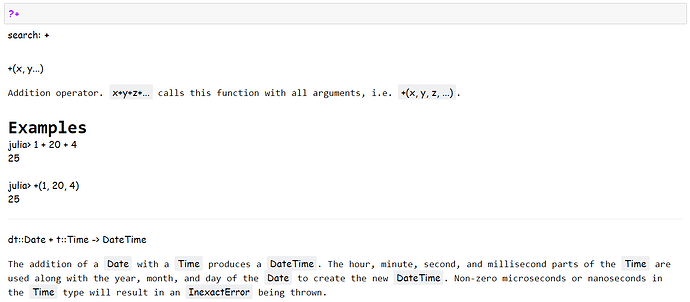
当我们从 REPL 进入帮助模式(按 ? 键), 或者在 Jupyter Notebook 中使用 ? 查看函数的帮助信息时, 丰富多彩的帮助文字背后即是 Markdown.jl 在发挥作用.
从 docstring 开始
查看 + 的说明文档时, 你会发现字体、颜色、样式并不是唯一的,这是如何实现的呢
要弄清楚这一点, 我们需要引入几个 macro 和
MD这个函数
using Markdown
using Markdown: @doc, @doc_str, MD
首先将
+的 docstr 保存下来, 使用 @doc 保存到 doc 变量, 可以发现, doc 的类型是 MD, 这种类型就是 markdown 在 Julia 中的被解析的对象, 且 MD 有两部分, 一部分是 meta, 反映函数的元信息, 另一部分是 content 是一个类型为 MD 的一维 array, 用来具体说明函数的用法. 也就是说, docstring 可以由各种 MD 实例组成.
doc = @doc +; # type: MD
doc.meta
Dict{Any,Any} with 3 entries:
  :typesig => Union{}
  :binding => Base.:+
  :results => Base.Docs.DocStr[DocStr(svec("    +(x, y...)\n\nAddition operator…
doc.content
2-element Array{Any,1}:
 ```
+(x, y...)
```

Addition operator. `x+y+z+...` calls this function with all arguments, i.e. `+(x, y, z, ...)`.

# Examples

```jldoctest
julia> 1 + 20 + 4
25

julia> +(1, 20, 4)
25
```
那么你会想到, 如果我们有了
MD各种实例, 如何重新组合成完整的 docstring 呢?
MD函数可以帮助你实现. 它接受两种类型方法
传入类型为 MD 的一维 array 时, 可组合起来形成一个新的 MD
传入类型为 Dict 类型时, 可添加到 MD 实例的 meta 部分, 作为辅助说明
根据这个思路, 你可以写出
+的 伪 docstr
docPseudo = MD(Vector{MD}(
        [doc.content[1], doc.content[2]]
        )
);
docPseudo.meta = Dict(:typesig => Union{}, :binding => Base.:+, :results => docPseudo);
docPseudo # 结果和 + 的文档是一样的, 限于篇幅就不放上来了
利用 @doc 进行注释
从上面的讨论中, 我们知道 文档字符串在 Julia 中就是 MD 对象, 那么如何将字符串"变成"函数的文档呢?
答案: 使用
@doc宏利用命令
@doc @doc或者?@doc, 你会发现@doc有两个功能:
- 获取某个对象(函数、宏、变量)的文档
- 给某个对象(函数、宏、变量)添加文档
你或许已经知道,在 Julia 中我们在函数体前用
"""给函数做注释:
"""
print `param` (take **Int** type as the argument)

# First Examples

```julia
julia> str = "Hello World\n"
julia> Print(str*str)
$(let str = "Hello World"
    str*str
end)
```
"""
function Print(param::String)
    println(param)
    end
但在 REPL 中, 以上方式会无法将字符串解析成文档字符串(运行结果只是单纯的一段字符串和一个函数体), 使用
mddoc字符串宏给函数做注释时会报ERROR: syntax语法错误这时应使用
@doc宏和->符号给函数(或者任何你想要注释的对象)做注释
@doc """
print `param` (take **Float64** type as the argument)

# Second Examples

```julia
julia> r = rand()
julia> Print(r)
$(let r=rand()
    r
end)
```
""" ->
function Print(param::Float64)
    println(param)
    end
或者
docstring = """
print `param` (take **String** type as the argument)

# Third Examples

```julia
julia> Print(1)
1
```
""";

@doc docstring Print(param::Int) = print(param)
查看
?Print
print param (take Int type as the argument)
First Examples
julia> str = "Hello World
"
julia> Print(str*str)
Hello WorldHello World
print param (take Float64 type as the argument)
Second Examples
julia> r = rand()
julia> Print(r)
0.40218381068451414
print param (take String type as the argument)
Third Examples
julia> Print(1)
1
你会惊喜地发现, 随着 method 的增加, docstring 也能够依次增加, 并且如果需要覆盖某种 method, 只需要重新使用
@doc进行注释
@doc "# Same Type as String" Print(param::String) = print(param);
?Print # 或者 @doc Print
Same Type as String
print param (take Float64 type as the argument)
Second Examples
…(后面的内容省略)
除了函数, Julia 还可以对常量、变量、数组或者其他类型的对象进行注释
# 对 MD 对象进行注释
mdObject = doc"mdObject"
@doc "this belongs to `md` object" mdObject
@doc mdObject
# 结果为: this belongs to `md` object
# 对常量注释
@doc "# Constant
**$(typeof(imag))** type

the square is $(imag*imag)" ->
const imag = 1im

@doc imag
Constant
Complex{Int64} type
the square is -1 + 0im
从上面这个例子可以看到, Julia 的插值功能非常强大, Julia 能够先将变量的值"计算"出来, 然后"链接"到 docstring. 然而 docstring 并非能够动态地把值"链接"过来, 请看以下例子:
@doc "# Vector of Random Variables
param `n`: length of the vector
defalut `n` = $(length(num))
"  num = rand(3);
@doc num
Vector of Random Variables
param n: length of the vector
defalut n = 3
num= rand(1);
@doc num
Vector of Random Variables
param n: length of the vector
defalut n = 3
更改了 num 的值, 但是 docstring 依然是第一次赋值的结果, 在很多场景下这非常实用, 尤其是对常量注释
但是我们可以遵循之前讨论的思路, 用新的 MD 对象进行覆盖
@doc "# Vector of Random Variables
param `n`: length of the vector

defalut `n` = $(length(num))
"  num = rand(100)

@doc num
Vector of Random Variables
param n: length of the vector
defalut n = 100
实现 MD 实例: 从字符串到 MD 对象
接下来, 你会想知道, 如何写出 MD 实例, 有两种方式:
- 对符合 markdown 语法的字符串,使用
md和doc字符串宏 (string macro)、@doc_str宏(macro) 、Markdown.parse()函数直接转化成 MD 对象- 对普通字符串,使用
Markdown.jl的相关函数: Header、 LaTeX、 Image、 Link、 Bold、 Italic、 Table、 Code、 Footnote、 Paragraph 等进行相应地组建 markdown 结构
用宏和函数解析 markdown 字符串
md_logo = md"""
# Julia Icon

""";
doc_str_logo = @doc_str """
# Julia Dragon Icon

""";
str = """
# Julia Three-Balls Icon

"""
parse_logo = Markdown.parse(str);
mdChunk = MD(Vector{MD}(
[doc_str_logo, md_logo, parse_logo]
)
)
Julia Dragon Icon
Julia Icon

Julia Three-Balls Icon

在解析含有插值字符串时, 这三种方式略有不同,
md字符串宏会把不会对插值代码求值,parse函数会对插值求值, 而@doc_str宏无法解析含有插值的字符串
md"""
print `str` (only take **String** type as the argument)

# Examples

```julia
julia> Print("Hello World")
$(let str="Hello World"
   str
  end
)
```
"""
print str (only take String type as the argument)
Examples
julia> Print("Hello World")
$(let str="Hello World"
   str
  end
)
Markdown.parse("""
print `str` (only take **String** type as the argument)

# Examples

```julia
julia> Print("Hello World")
$(let str="Hello World"
   str
  end
)
```
""")
print str (only take String type as the argument)
Examples
julia> Print("Hello World")
Hello World
@doc_str """
print `str` (only take **String** type as the argument)

# Examples

```julia
julia> Print("Hello World")
$(let str="Hello World"
   str
  end
)
```
"""
MethodError: no method matching @doc_str(::LineNumberNode, ::Module, ::Expr)
Closest candidates are:
  @doc_str(::LineNumberNode, ::Module, !Matched::AbstractString, !Matched::Any...) at /buildworker/worker/package_linux64/build/usr/share/julia/stdlib/v1.3/Markdown/src/Markdown.jl:56
函数式编程组建 markdown 结构
using Markdown
using Markdown: MD,  Header, Italic, Bold,  plain, Code, LaTeX, Paragraph, html
根据 markdown 语法和 HTML 结构, 我们知道 md 中的
# title写法其实是对应 html 的<h1>title<\h1>
在 Julia 中, 用函数的方式把 h1 生成相应 MD 对象的过程是: 先使用Header()生成 Header 对象, 再用MD()函数接收一维数组, 把数组所有内容转化成一个整体的 MD 对象:
h1 = Header("title") # type => Header{1}
md_header = MD(h1) # type => MD
md_header == md"# title" # => 结果: true
再看一个简单的 md 语句 md1
md1 = md"foo *italic foo* **bold foo** `code foo`"
foo italic foo bold foo code foo
如果我们需要实现 md1 的 markdown 结构, 用函数的形式, 需要写成
md2 = MD(Paragraph(["foo ", Italic("italic foo"), " ", Bold("bold foo"), " ",  Code("code foo")]))
md1 == md2 # => 结果: true
同样地, 我们可以"合并"不同类型的数据作为一个整体的
MD对象:
md3 = md"""inline $\LaTeX$ formula

$\frac{1}{2}$

interline formula $$\frac{1}{2}$$
""";

LATEX = LaTeX("\\text{end with}\\, \\LaTeX \\cdots");
v = [Header("MD 实例"), md3,
    Header("MD 实例转化的普通字符串"), plain(md3),
    Header("LaTeX 公式"), LATEX]
md_v = MD(v);

map(x->typeof(x), vcat(v, md_v))
7-element Array{DataType,1}:
 Header{1}
 MD
 Header{1}
 String
 Header{1}
 LaTeX
 MD
@doc的第一个参数不仅支持字符串, 还支持 MD 对象:
o5 = .5;
@doc md_v o5;
@doc o5
MD 实例
inline \LaTeX formula
interline formula \frac{1}{2}
MD 实例转化的普通字符串
“inline $\LaTeX$ formula \n\n$$\n\frac{1}{2}\n$$\n\ninterline formula $\frac{1}{2}$\n”
LaTeX 公式
MD 对象转化成 String
MD 对象可以转化成以下三种字符串:
- md 格式的字符串:
plain()函数- html 格式的字符串:
html()函数- tex 格式的字符串:
latex()函数
md1 = md"foo *italic foo* **bold foo** `code foo`"
foo italic foo bold foo code foo
plain(md1)
"foo *italic foo* **bold foo** `code foo`\n"
html(md1)
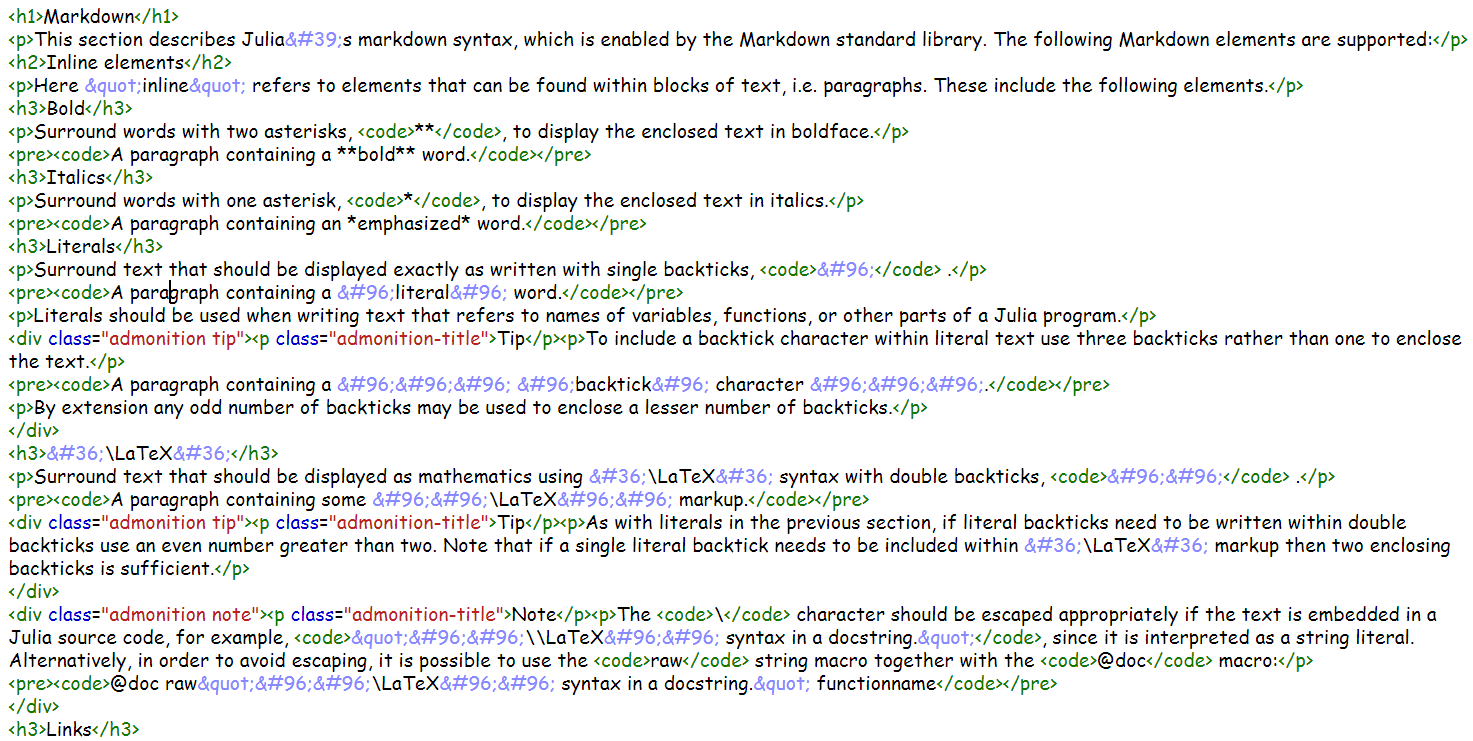
"<p>foo <em>italic foo</em> <strong>bold foo</strong> <code>code foo</code></p>\n"
latex(md1)
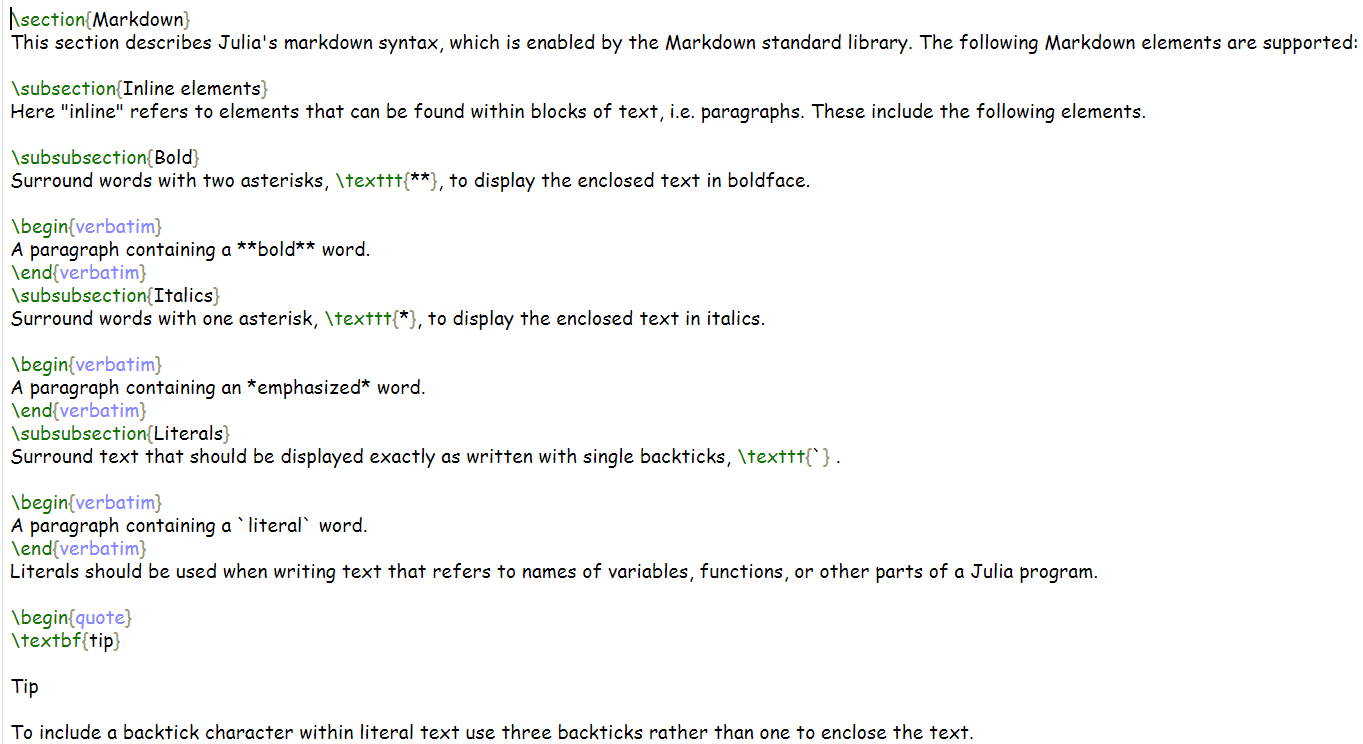
"foo \\emph{italic foo} \\textbf{bold foo} \\texttt{code foo}\n\n"
实现文档类型转化: md 文件 转化成 html 文件和 tex 文件
MD 对象不仅可以用于添加文档说明, 还可以实现 markdown 与其他文档类型相互转化
比如我们有一个 markdown 文件 (为方便说明, 我们从 github 上下载 Markdown.jl 的 md 文档)
using HTTP

url = "https://raw.githubusercontent.com/JuliaStdlibs/Markdown.jl/master/docs/src/index.md"
r = HTTP.request("GET", url; verbose=1);
# verbose 参数用于打印请求的客户端和服务器之间信息流, 0 表示不显示信息, 1 表示打印最简单的交互信息, 2 表示打印 request 请求和 response 响应内容信息, 3 表示打印详细的 Debug 信息

mdString = String(r.body); # type: str
open(f -> write(f, mdString), "index.md", "w"); # 保存成名为 index.md 的本地文件
# 将本地 md 文件解析成 MD 对象
mdInstance = Markdown.parse_file(joinpath(pwd(), "index.md")); # => type: MD
你可以先把 MD 对象转化成 String, 然后把 String 保存成文本文件:
mdHtml = html(mdInstance); # => type: str
open(f -> write(f, mdHtml), "index.html", "w");
mdLatex = latex(mdInstance); # => type: str
open(f -> write(f, mdLatex), "index.tex", "w");
而另外一种简便的转化方法是使用 html(io::IO, md::MD) latex(io::IO, md::MD) 方法, 直接进行 IO 操作 (这得益于 multiple dispatch)
open(f->Markdown.html(f, mdInstance), "readme.html", "w")
# 等价于
# io = open("readme.html", "w");
# Markdown.html(io, mdInstance);
# close(io)
# 或者使用 tohtml 函数
# open(f->Markdown.tohtml(f, mdInstance), "readme.html", "w")
open(f->Markdown.latex(f, mdInstance), "readme.tex", "w")
参考资料
- Markdoan.jl github地址: https://github.com/JuliaStdlibs/Markdown.jl
- Julia 官方文档介绍: https://docs.julialang.org/en/latest/stdlib/Markdown/
- 国外博客 MonthOfJulia Day 36: Markdown: #MonthOfJulia Day 36: Markdown | juliabloggers.com
- markdown 语法中文介绍: http://www.markdown.cn/
- markdown 语法 cheatsheet: Markdown Cheatsheet · adam-p/markdown-here Wiki · GitHub


